Tiny Proxy is available in the Chrome web store.
By default, TP is not enabled in your browser incognito mode.
To use a proxy defined in your settings, left-click TP's icon to open the popup window.
You can fine-tune the list in each proxy profile. But the modified list will only be used if that particular proxy is used as the "root" proxy (the one that appears selected in the popup window).
If Tiny Proxy is enabled in incognito mode, you can encounter an intermediate state of priority conflict.
If present, these red dotsmean that Tiny Proxy has only partial control. The upper dot indicates no control on standard tabs, and the lower dot, on incognito tabs.
Other icons are indicative of the type of proxy currently selected.
system
Only if the option is enabled (not by default):
A temporary proxy has been set with [ System ] as current proxy, but TP has no "System proxy" defined.
See below for more information on using "System proxy".
Starting with version 0.5, a new scheme has been added: "[ auto ]" will create a server that behind the scene is a "pool" proxy with the 4 schemes. Preferably this option is only for testing a server. I don't recommend using it in an everyday situation. It can, more than often, create a "time-out" period of more than a minute before actually connecting for the first time (and that, whenever a modification is done to the current proxy tree). This is the reason why this option is only available in the "all" line.
Note: Tiny Proxy doesn't handle proxy server authentication yet. It's probably only a matter of testing. You're free to volunteer.
Tiny Proxy warns you if you enter a server IP/name already used in another server proxy.
 . They can also be dragged to another position. A condition can be disabled by selecting the checkbox, or deleted by clicking the red X mark
  . The arrow
  is used to access the proxy profile used in a rule.
Instead of selecting a proxy from the dropdown list, you can drag it from the global list on the left side of the screen, and drop it on the chosen field. (new in version 0.6)
. They can also be dragged to another position. A server can be disabled by selecting the checkbox, or deleted by clicking the red X mark . The arrow is used to access the server profile.
Instead of selecting a proxy from the dropdown list, you can drag it from the global list on the left side of the screen, and drop it on the chosen field or on the "add server" button. (new in version 0.6 and 0.6.3)
Important note:
a "pool" proxy will fail if the first reactive server accepts connections but sends empty responses to the browser (a faulty server or one with invalid credentials). Then, the servers following it in the list won't be tested. You'll have to identify the faulty server and disable it to fix the behavior. A future version of Tiny Proxy might come with a way to detect such servers. But until then...
Syntax errors here, or other types of errors, won't cause problems in the rest of your proxy config. (new in version 0.6)
Instead of selecting a proxy from the dropdown list, you can drag it from the global list on the left side of the screen, and drop it on the chosen field. (new in version 0.6)
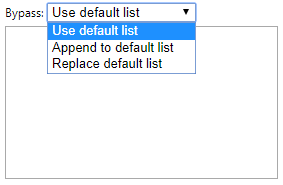
By default, the bypass list is the default list, editable from the top menu.
You can either leave it unchanged, append new lines, or replace the default list with the content of the new list (which can be empty).
The alias proxy has a special default option, "Use option of aliased proxy". Which means that, if it is the root proxy, it will use the bypass option of the aliased proxy (alias proxies can be chained).
In summary, only one bypass list is used. The one associated with the root proxy. (If [ System ] or [ Direct ] is used with a temporary proxy, the bypass list used is TP's default one).
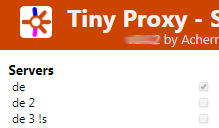
Proxies are grouped by type and prefixed with the symbol of that type. The same symbol is used in the popup window.
[ Direct ] tells the browser to send the requests directly to the web server
[ System / Direct ] the proxy to be used is Tiny Proxy's "System proxy". If none is defined, it falls back to "direct".
 #1
#1
 #2
#2
 #3
#3
 #4
#4
 #5
#5
Fields colored in red indicate a syntax error, an invalid, or an empty value. Purple has to be investigated, but is not always fatal.
In all examples above, red will prevent TP from creating a valid proxy with these values. They will be ignored when it creates a script and transmits it to chrome.
#1, when parts of the "all" line are invalid, will cause failure in a switch (prior to version 0.6.1 it was redirecting to "direct") and will be ignored elsewhere. The other scheme lines will just be ignored in case of error, just like if they were empty.
#2 A red proxy is ignored, while a purple one is valid, and used. Purple in this case indicates that invalid values have been filled into the schemes fields, which isn't problematic (only) here (they aren't used in pools anyway).
#3 indicates an invalid proxy name. Rules using it will be ignored.
#4 means that the proxy profile aliased contains invalid values that will cause failure for this alias. It will probably redirect to "direct" or be ignored.
#5 like for aliases, purple indicates errors in sub-proxy. Rules can be ignored due to this.
(Proxy used in line 2 is invalid because it must be a switch.)
Due to limitations of the proxy system implemented for extensions, an extension can't access your system's proxy settings. If you want to use these settings in TP, you need to fill in the "System proxy" (from the top menu).
Note that selecting [ System ] in the popup window will use the real system proxy. But once TP adds any proxying (eg. temporary rules) it has to use its own definition (or fall back to [ Direct ] if none is set).
The "System proxy" can be defined as a server, a switch, a PAC script, or disabled. Disabling doesn't clear the settings. They can still be used if you decide to enable it again.
For most of you, your system has no proxy defined. TP has this special proxy to help you in case you need it.
 #1
#1
 #2
#2
 #3
#3
The popup window is the interface between the user and Tiny Proxy. The user can select a proxy from the list displayed, and the browser will automatically switch to that proxy. If somehow the proxy profile is invalid (or incomplete), TP falls back to [ System ] or [ Direct ] (screenshot #4).
Screenshot #2 shows an alias used by the proxy in use, and #3 another alias used by a temporary rule.
#3 shows a list of temporary rules.
#4 also shows the "add" panel. This is the interface used for adding temporary rules.
 #4
#4
If the input field is empty, the list of available proxies (next to "Use:") displays only "switch" proxies. When the input field contains a hostname, the list is filled with all types of proxies except "switch".
Currently, the only available type of condition for a temporary rule is a host wildcard. Except for a switch proxy which contains its own conditions.
A temporary rule can be placed before or after the bypass list verification. Note that bypass lists associated with proxies used in temporary rules, are ignored.
The bypass list used while a temporary rule is set, is the one associated with the profile currently selected in the popup menu. or the default one when [ System ] or [ Direct ] is the choice.
If you want to export or share a small set of your proxies, drag them from the list on the left to the drop zone. The area will expand, and display 3 lists.
You add proxies by dropping them in the first zone. You can remove them individually using the X icon . Once a proxy is added, its structure is analyzed and all proxies it depends on (eg. switch and pool) are added (to the 3rd list). Moreover servers (":" prefix) are also added to the second list (as well as in the 3rd) when an alias (if it points to a server, as "youtube" in picture #2), a pool, or a server is added in the drop zone.The behavior allows you to export a proxy structure without - if you cross the checkbox - giving out your actual servers. This, while still being able to export some servers (present in the second list).
 #1
#1
 #2
#2
In these circumstances, if you want to foolproof any possible scheme, you can select:
Tiny Proxy doesn't handle proxy server authentication. It's probably only a matter of testing. You're free to volunteer.
All settings must be saved to take effect.
The only exceptions are for the settings of the "options" panel, and the "in popup" checkboxes, whose modifications are immediate.
The export file format is only compatible with Tiny Proxy. TP understands only its own export files. If you need another format, point me to a description of that other format.
Feel free to report bugs or ask for improvements. Use the extension page to post comments.